
Learn to saddle stitch.
Two needles, one piece of thread. Follow the pictures, then repeat the same stitch along your seam.
Thread both needles.
Cut roughly five times the length of the seam. Attach a needle to each end of the same piece of thread.
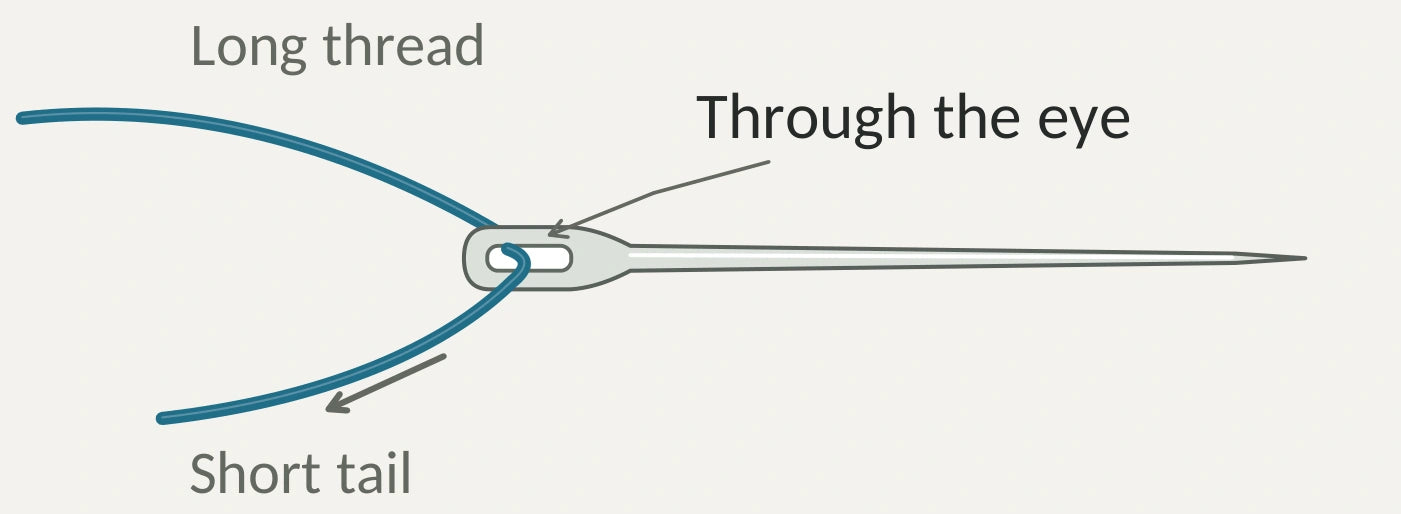
Through the eye
Pass the thread through the eye. Leave a tail about two needle lengths long.
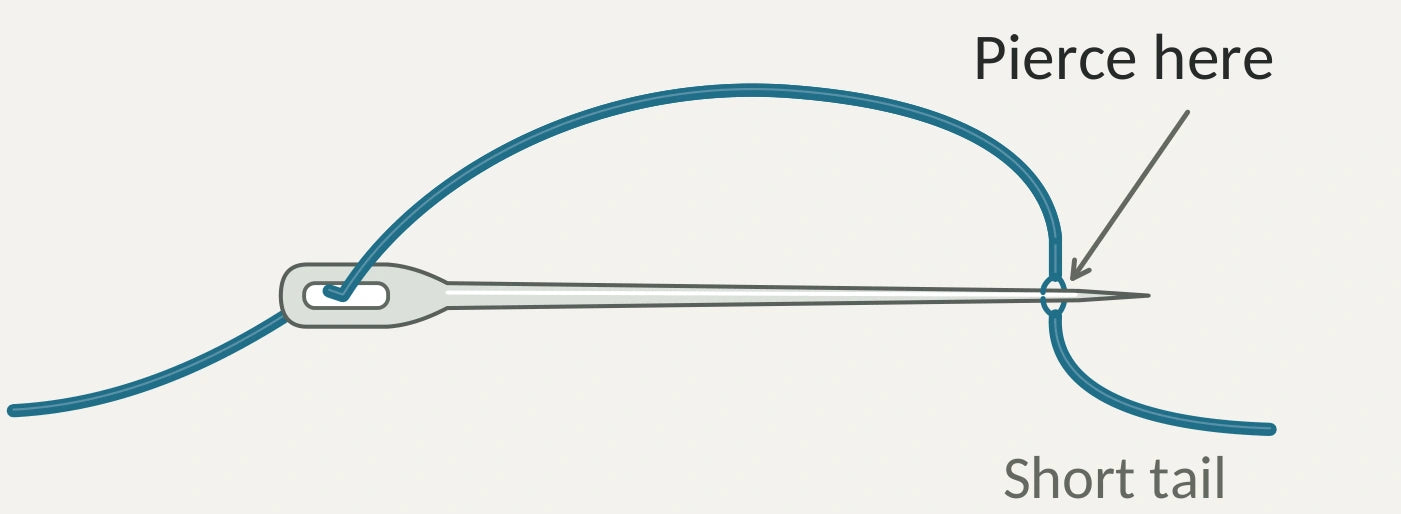
Pierce the short tail
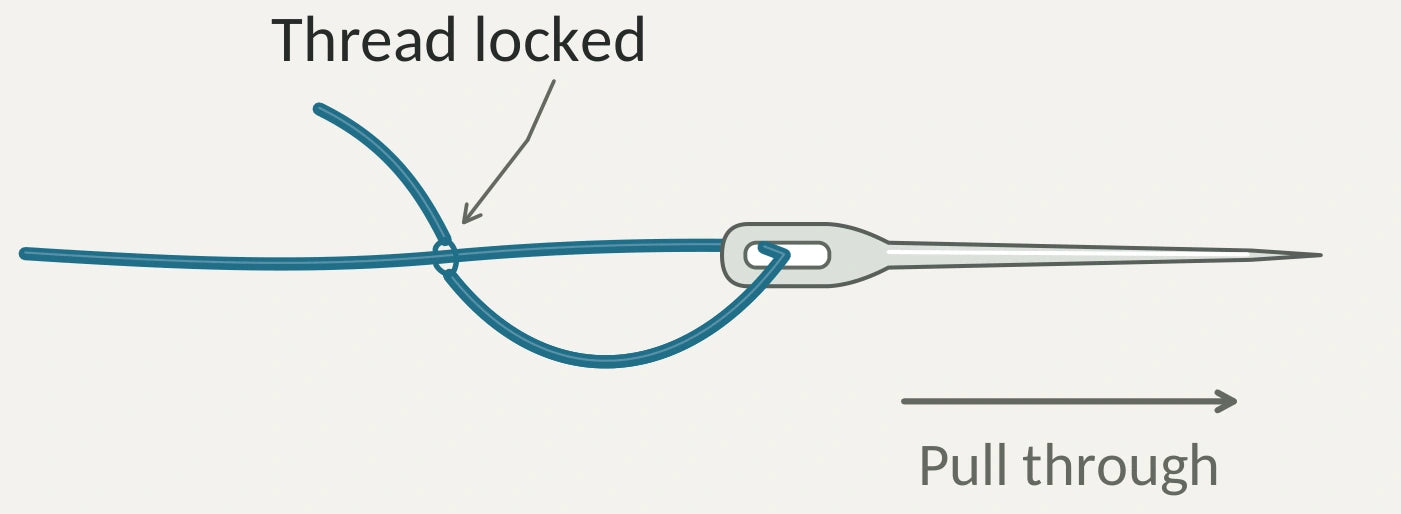
Bend the tail back and push the needle through the middle of the thread near its cut end.
Pull through to lock
Slide the pierced tail along the needle and over the eye. Straighten gently to lock. Repeat at the other end.
Start with equal lengths.
Line up the holes through all the leather pieces before you start.

Pass through the first hole
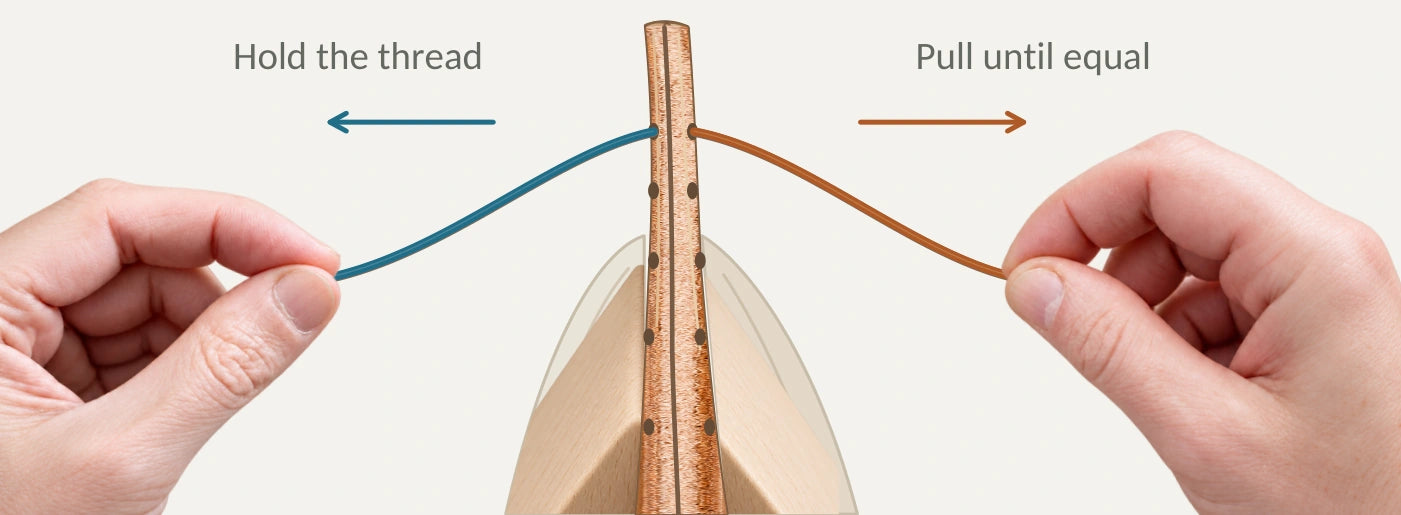
Pass the right needle all the way through the first hole, from right to left, through every piece of leather.
Pull until equal
Pull the thread out to either side. Adjust it until you have the same length on each side.

Then repeat this stitch.
Work through the pictures below for each new hole. Take it slowly and keep the thread moving freely.
Two colours show the two ends of one thread.
1. Check the next hole
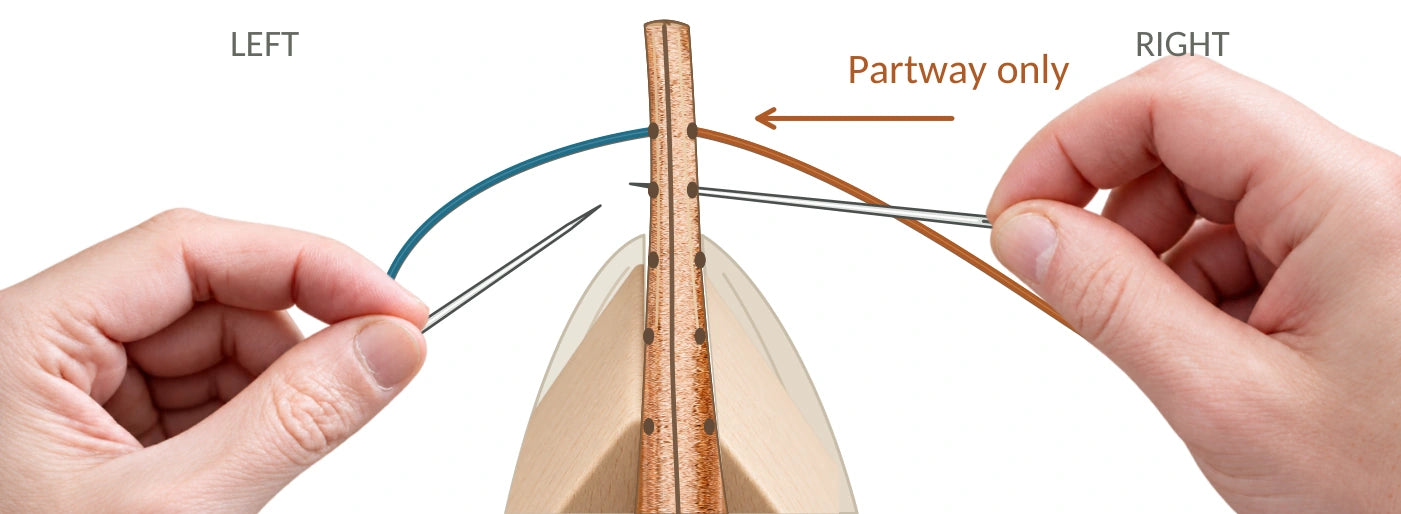
Use the right needle to find the next hole through every layer. Only the point needs to emerge on the left. Do not force it.
2. Follow with the left
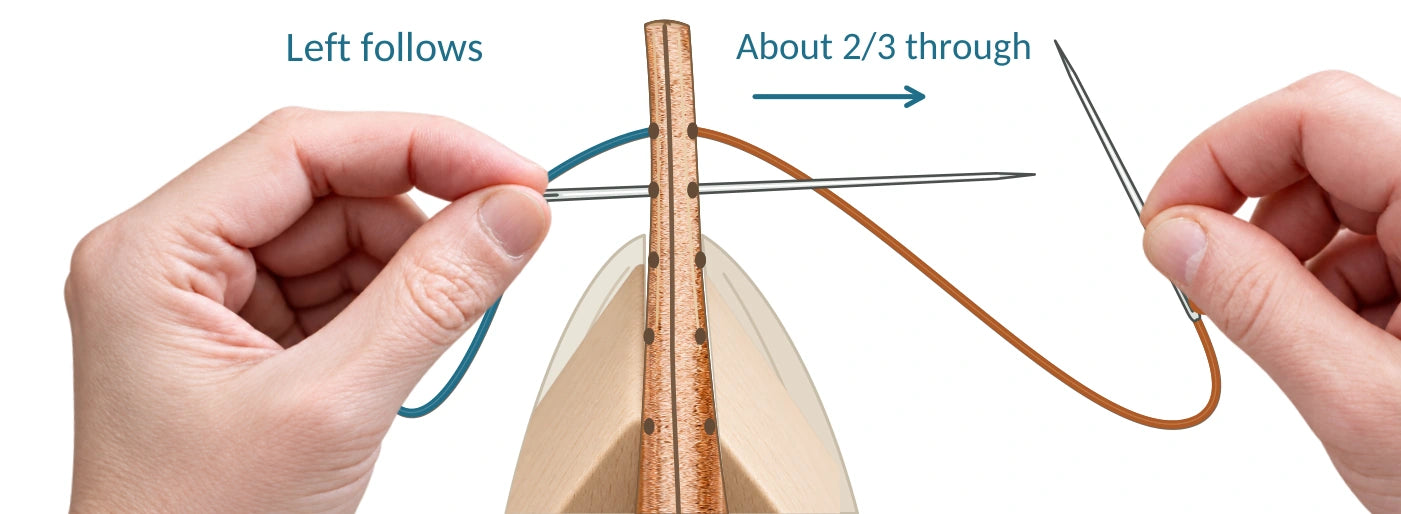
Withdraw the right needle as the left follows through the same hole. Stop when about two-thirds of the left needle is through.
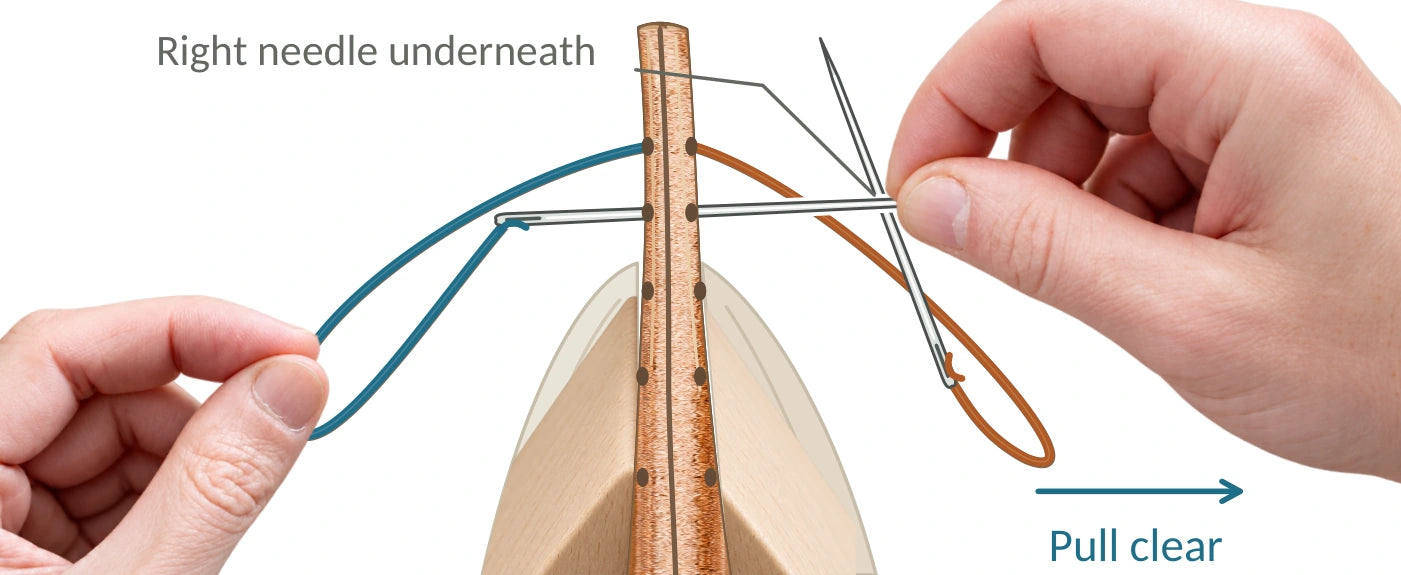
3. Cross underneath
Cross the right needle underneath the emerging left needle. Pull the left needle clear and leave slack on the left.
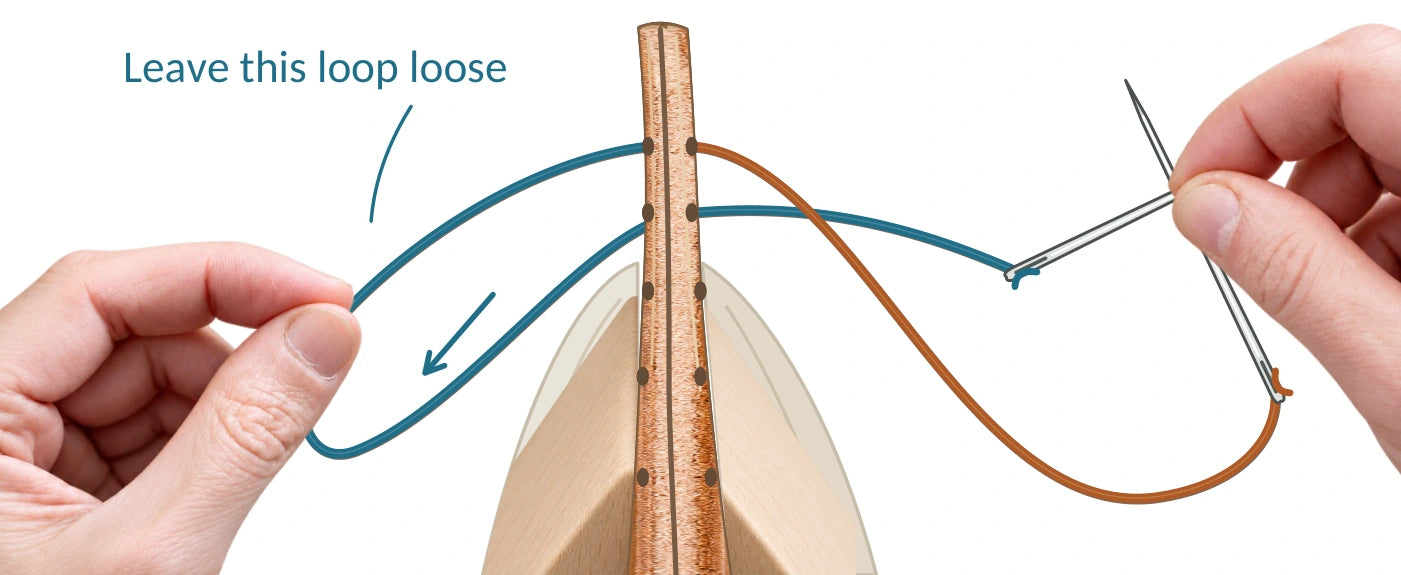
4. Make room
Draw the first thread gently towards you to make room behind it. Keep the left loop loose.
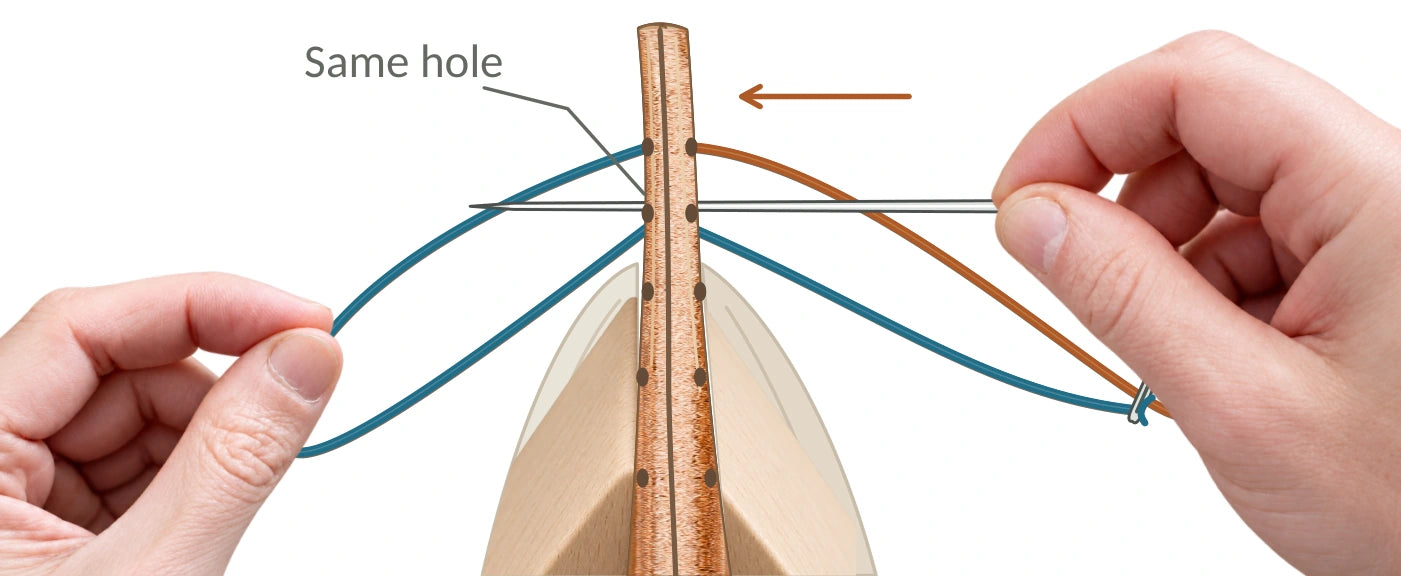
5. Return through
Pass the right needle through the same hole, behind the first thread. Leave its point showing on the left.
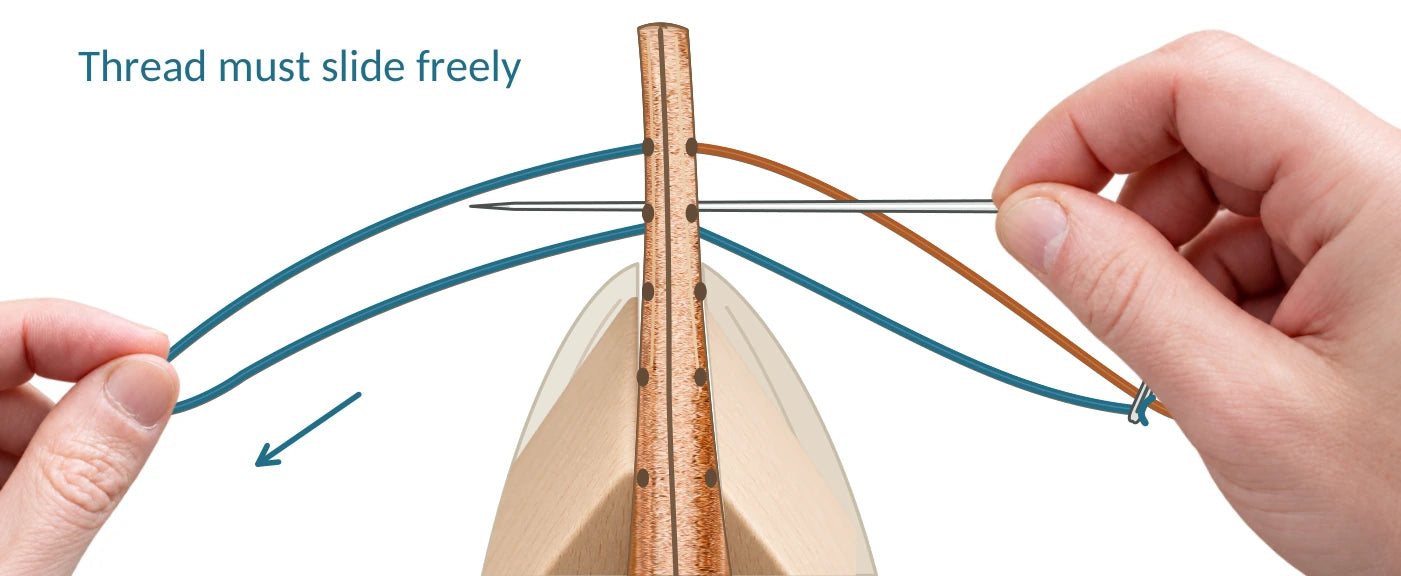
6. Check the thread
Tug the left thread gently. It should slide freely. If it catches, withdraw the needle and pass beside the thread.
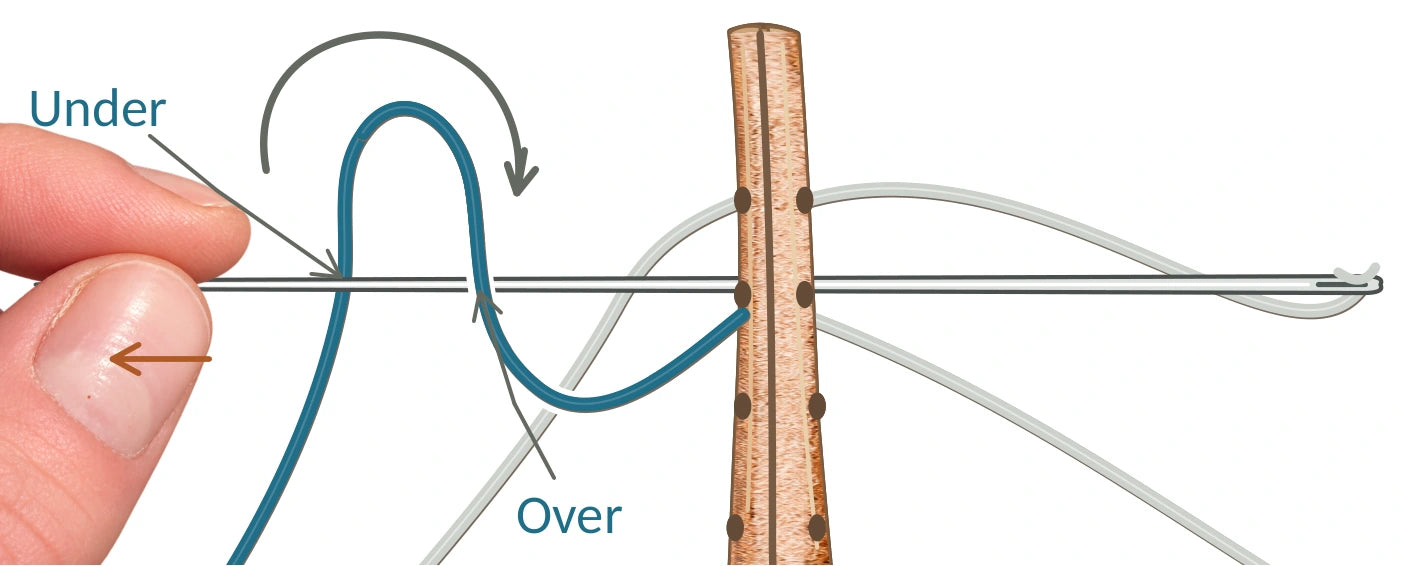
7. Make the loop
Lift the loose left thread over the emerging needle, then underneath. Keep the wrap open as you pull the needle through.
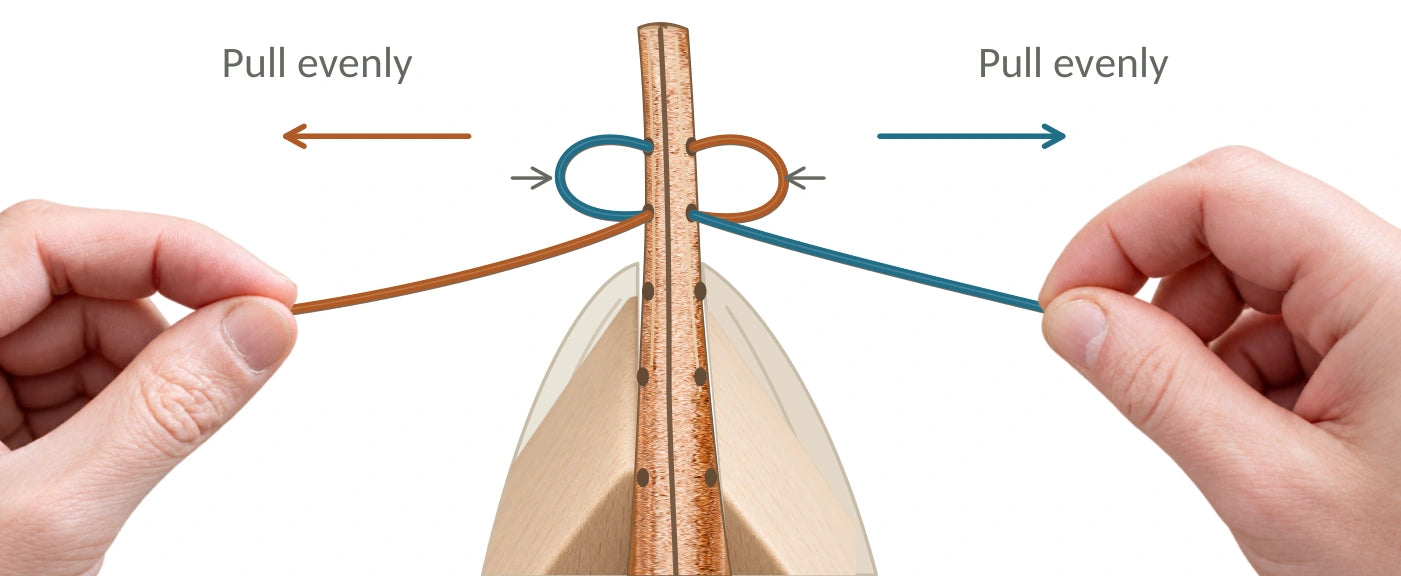
8. Tighten and repeat
Pull both ends evenly until the loose loops draw snug. Move to the next hole and repeat from step 1.
Finish the seam.
At the end, backstitch two stitches, then trim the thread on the least visible side. Ease the needle through one layer at a time.
If the thread catches
You may have pierced a strand. Back the needle out and pass beside it. If the thread is already trapped, unpick or carefully cut out the affected stitches and restitch.
The wooden jaws in the pictures are a stitching pony, used to hold the leather. A pony is not included in the standard kit.